Aby korzystać z zawartości forum należy się zarejestrowaćTUTAJ Ten aplet jest widoczny tylko dla niezarejestrowanych użytkowników! :-) Rejestrując się na forum uzyskujesz m.in. rabaty na cygara u forumowych partnerów (sklepy cygarowe). Zapraszamy!
Znalazłem jakiś czas temu ciekawy artykuł jak wykonać popielnicę, jako, że chciałem zrobić samemu na wzór CAO Cubist.
Teraz na pewno zadanie będzie prostsze
Here's a project I recently finished. I've wanted a nice, large ashtray for my smoking room. I really like the CAO "Cubist" ashtray, but the price is a bit more than I wanted to pay. So I decided to do my own similar in style but larger yet than the Cubist.
I wanted the wood to be an exotic. My smoking room is going to have different, unique shades of woods in it...so I wanted something with a bit of "WOW!" to it. So an exotic wood was the way to go for me. Luckily, there's a local exotic wood retailer, so away I went!! There was plenty to choose from. Zebrawood, Bubinga, Bloodwood, Wenge, Zebrawood...the list went on and on. I finally spotted the wood I wanted. It had a few qualities I needed for the project. 1) Price. Some of those woods were $20+ per board foot. This one was about $7.50. 2) Hardness. This wood was dense and hard. There would be ashes and probably some bumping around of the ashtray, so durability was important. 3) COLOUR!! The colour looked great, and I knew it has some good possibility of being beautiful. So the wood I chose was PURPLE HEART, a South/Central American hardwood.
I bought several feet of 10"x1" thick wood. I wanted to have enough to make at least 2 big ashtrays plus a few small ashtray I had been thinking about. Plus a couple feet extra for testing for colour, finish, etc. After getting the wood, I read up on it. The colour when originally cut is brownish, but as it hits the air and light turns to the nice purple colour. Also I found out a chemical agent in the wood, Peltogynol, was what altered the colour and oven heating had an effect on this. So I put a few pieces in the oven to see how they would turn out. I liked the colour in the 350-425 degree range after 10 minutes in the oven. Neat.
Now that the colour issue was settled, I had to design it. I eye-balled a few designs but wanted mine larger using as much as the 10" width of the wood as possible. I settled on a size roughly 9.625" x 9.625" x 3" tall. I cut my pieces and laminated 3 pieces together to get the desired thickness. While these dried I made the design using CAD software. The design looked pretty good on the screen. I even photo-realistically rendered it in a purple colour to get a better idea of the finished product. I hoped it would look as good when done!
With my chunks of wood dry, I had to set about machining these. Since the shape is a bit complex, it would be tough to do this without special tool. Since I have access to CNC Machining Centers, I would machine these out this way. I made the programs using a CAM package and put the block in a vise and away I went. I immediately notice that the wood splintered easily on the edges. I tried different tooling..from regular high speed steel all the way up to titanium coated carbide. It didn't seem to matter. A couple areas has splinters..and not much I could do about it. Once the first one was done and my design proved out, I did the second one. From start to finish, total machine time was maybe 20 minutes each. I can't imagine how long it would take using traditional workshop methods. Anyone who could make this in a home workshop would be very skilled.
I did the usual sanding from a coarse all the way down to a fine 400. Along the way, I noted something. A sliver from Purple Heart festers in the skin VERY quickly. I don't know if it's that same chemical that controls the colour, but the sliver would become almost infected-like within a day. :'( Once sanding was done, getting the colour right was my next challenge. I tried various light stains, clears, oils. An oil would be the way to go, since even the slightest tinge altered the lovely purple colour. I chose a Danish Oil. I did several coats and sanded ever so gently with 0000 steel wool in between. I'm no expert wood finisher unfotunately and the Purple Heart was a bit tough to get perfect. I wish I was better in this regard. But overall the project came out OK I think. Please tell me what you think.
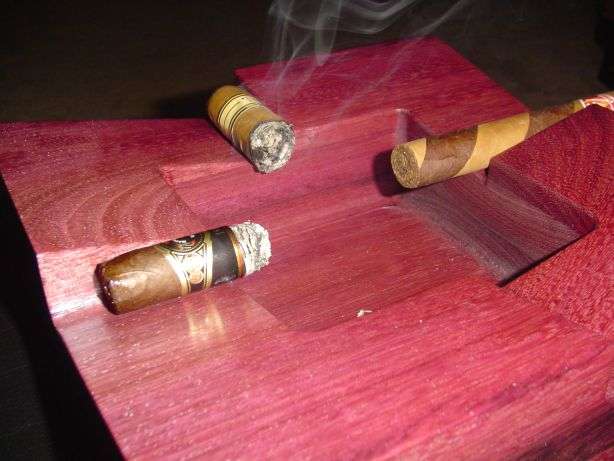
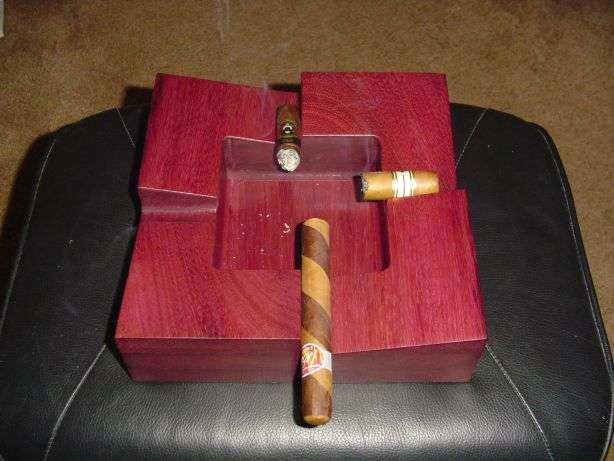
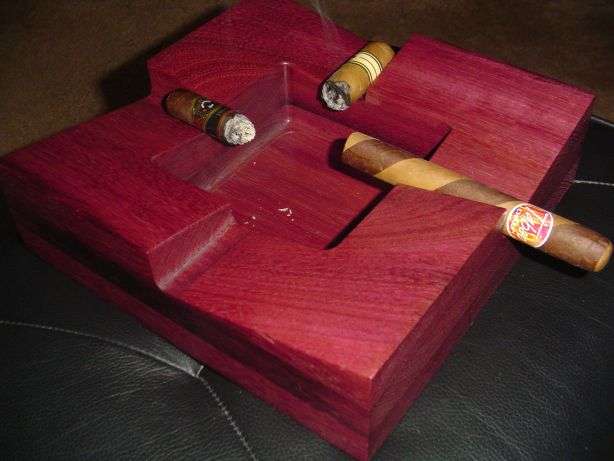
The cigars in the ashtray are : A NUB 358 being smoked by me, a Macanudo 1968 being smoked by Import Queen and a Taboo Twist waiting on deck! You can get an idea of the size of the ashtray since the Twist is 6" long and the NUB has a 58 ring gauge. The colour itself doesn't show well in the pictures. Partly due to my crappy photography skills. It's much more purple in person.
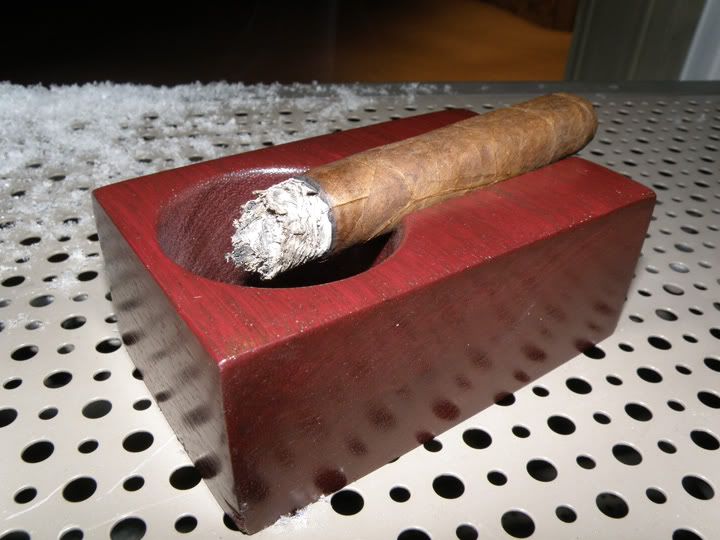
Oh..I've also included a picture of my little single cigar ashtray. The cigar groove is angled towards the hole so that if the cigar slip it won't fall off the backside but rather into the hole. This one has a light stain on it called "Cabernet". I gave one of these to Las Palmas to use for smoking cigars while he re-habs from his scooter mauling.
ciekawie mu to wyszlo ale uzyl obrabiarki numerycznej...nie kazdy ma do tego dostep. Musze kiedys skonczyc swoj projekt, z tym ze robie moja popielnice recznie.
Nie możesz pisać nowych tematów Nie możesz odpowiadać w tematach Nie możesz zmieniać swoich postów Nie możesz usuwać swoich postów Nie możesz głosować w ankietach Nie możesz załączać plików na tym forum Możesz ściągać załączniki na tym forum